I had helped a few, and kinda figured out, why not I just post the tutorial I made for them for the rest to try as well :)
So here goes...
PS: This is just basic tutorial. You can do SO MUCH MORE with Photoshop ^__^
No. 1
Firstly, open your preferred photo and the santa hat
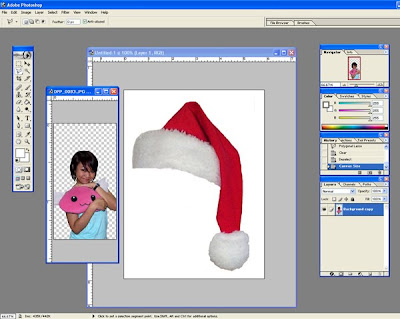
No. 2
Select the Polygonal Lasso Tool to key out the white background behind the santa hat or, in the future, any other pictures you want.
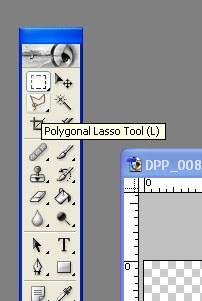
- Using the tool, trace the santa hat :)
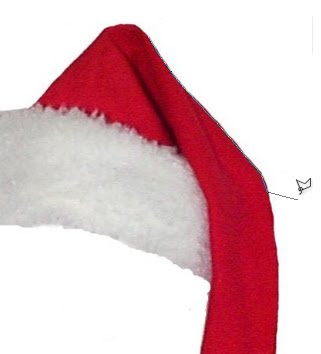
No. 3
After the first and the last end of the points connected, select CTRL+I (invert selection) to select the area OUTSIDE the selection, and press DELETE. If you don't do this, you'll delete the santa hat instead XD
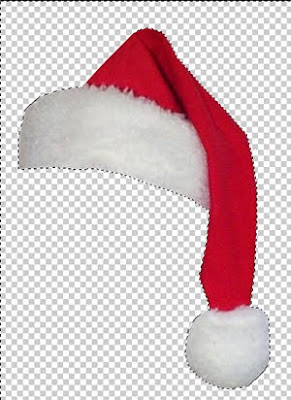
Another way of selecting the area you want to delete + FASTER, you can use the Magic Wand tool. Just click on the area that you want (try clicking it on the white bground behind the santa hat), it will auto select the areas with similar colours to the area you selected. Then, press delete.

No.4
- OK.. now that we have key out the background, it's time to put the hat on your selected picture :)
Using the Move Tool (the arrow), drag the santa hat file to your picture.
Put the hat layer on top of your 'ori picture' and name it "santa hat".

Resize the Santa Hat and adjust it (shortcut key: CTRL+T) to fit the size of the area in your picture (e.g. on the head).
You can minimize/close the santa hat working file now because we're now concentrating on the final file.

If you notice, i don't like the position of the hat. It covers my round face XD hehehe... so, click CTRL + T again, once it shows the bounding box, RIGHT CLICK on it and few options will come out. Select, FLIP HORIZONTAL and tada~ nicely positioned. You can also rotate it to adjust (as usual, select CTRL+T coz this option enable you to rotate, resize and so much more)
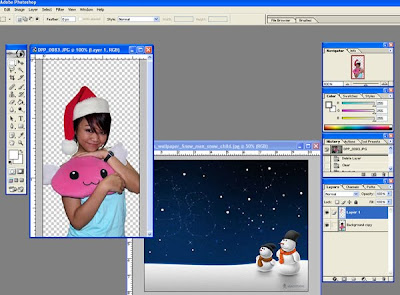
BONUS STAGE!
If you are feeling more creative, you can also key out your image background and replace it with a nice background.
For mine, i've keyed out my image background and choose a christmas'y' mood bground i got from the internet.
As what been done above, drag the new background to your current working file and place it under your 'Ori picture' layer. Let us name your background as 'New Background'
Then use CTRL+T again to resize the background and adjust it to anywhere and anyhow you like.

and you're done!
Tips:
Dont forget to adjust the brightness and contrast of your picture by selecting IMAGE -> Adjustment - > Brightness and Contrast.
You can also add basic glowy effect by selecting on your preferred layer e.g. Select the 'Ori picture' layer, right click on it and select BLENDING OPTIONS and then select GLOW.
Good luck!!! ^___^
.

 bobidom@yahoo.com


Good 1.. ^_^
rajinnya buat tutorial
nice photoshop!
A smile from SJ =)